MAKE: Design Wall for Quilt Studio
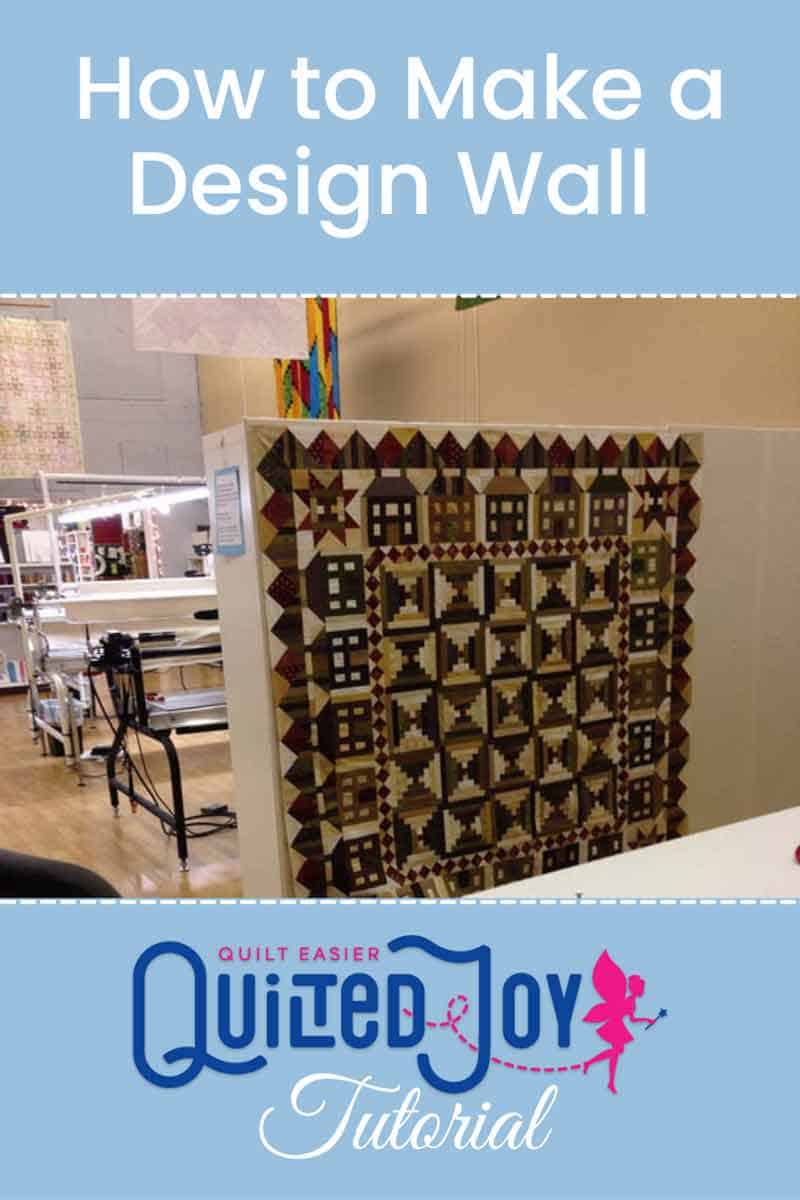
I made a design wall using Birdie Bird batting. Have you encountered this new product yet? Do you have a design wall? It is so incredibly helpful to have a place to pop blocks onto as you are working. You can audition colors, designs and layouts so easily!
I made my design wall and you can see all the steps below. If you'd prefer, we also have a premade design wall from Gypsy Quilter. You can see that below. It is grey.
Here's a photo of my design wall with my friend Karen's Log Cabin quilt sitting prettily on it.

This is the third design wall I've made in my life. Yes, I get around. The first one I made I used a thin white flannel on and it got droopy over the years. Because it was so thin, it also allowed the gigantic DOW CORNING logo on the insulation boards to shine through the fabric which was annoying. Plus, white was such a stark color contrast to the quilts that sometimes the design wall fought with the quilt blocks. This time I bought these 3/4" thick insulation boards from Home Depot.

I decided to mount them to the opposite side of my wonderful IKEA Expidit cubbies. The cubbies are 6' x 6' and are made up of 1' cubbies. Right now I've got them full of bargain flat fold fabrics that are quickly being snagged up by my customers. I'm not sure if I'm going to restock the flat folds once they've dwindled down more or not. I don't intend to be a fabric store and only plan on carrying wide backing fabrics so I'm still chewing on how to best use the cubby side of the Expidit.
I measured and cut the insulation boards to fit the 6'x6' cubbies. I want to be able to move the cubby units independently which meant I needed to make two design walls so if i needed to scoot the cubby unit somewhere else in the showroom I didn't have to keep the two cubby units side by side. I just duct taped the two pieces of insulation board that make up each cubby's wall. Then, I got smart and used WHITE duct tape instead to minimize the ghosting through the fabric.

When I made one of my other design walls in the past I decided to use just poly batting and that was a disaster. My blocks never stuck to it without using pins. Never again!

While I've used a double nap flannel when making design walls in the past, my new favorite is using Birdie Bird batting. It is perfect! This batting has a layer of grabby flannel stitched to a low loft cotton batting. Everything sticks to the flannel side and STAYS! It is a bit more than regular batting but it works so incredibly well and this Design Wall needs to stand the test of time!

I got a can of 505 temporary spray baste and sprayed the fabric and the insulation board. That way it won't get droopy over time like the first design wall I made years ago. I positioned the cotton batting side of the Birdie Bird Batting on the front of the boards and then peeled it back half way to expose the area I wanted to spray. Then I carefully smoothed out the Birdie Bird Batting onto the tacky insulation board.

Next I flipped the board over and placed strong double sided duct tape
(also called exterior carpet tape) all along the outside edge of the back side of the design wall. This is the side that will be against the wall. Note that since the design wall will be visible through the cubby openings on one side, I used the non-printed side as the "back" of my design wall. That is the side that you can see through the cubbies so I wanted it to be neat and not have the pink panther peeping through. :) If this design wall was going up against a wall, I'd place the printed side against the wall and the clean side facing out so as to not allow any shadowing of the logo through the flannel.
I peeled away the final side of the double sided duct tape and brought the batting around like wrapping a package to the back side. That tape is strong so it holds nicely. I made a mitered fold in the corners and used my white normal duct tape to hold those corners down. Finally I got out the super sticky industrial grade velcro.

I put strips of it on the cubbies and once I got them all mounted I unpeeled the final sticky backing and my mom helped me press the design wall onto the cubbies. Since the design wall is being held on by velcro, I can remove it down the road if I want to replace anything.

Here's the finished design wall all ready to play. I'm excited about how this is functioning as an easy room divider as well!

Here's what it looks like from the front of the fabric cubbies.

I have other sewing furniture items that I've made myself. You might like to see my BIG ironing board station complete with storage.
Or, check out the table I made for my sewing machine from an old kitchen table.
I have a cutting station I made for my Die Cutter out of recycled cabinetry that is pretty cool too!
Oh, and I made my own cutting table from an old ping pong table!

I’m Angela- Co-host of the Fons & Porter’s Love of Quilting PBS show. APQS Long arm Dealer and Educator. Triplet Momma. Designer. Thread Bimbo.



Leave a Reply