


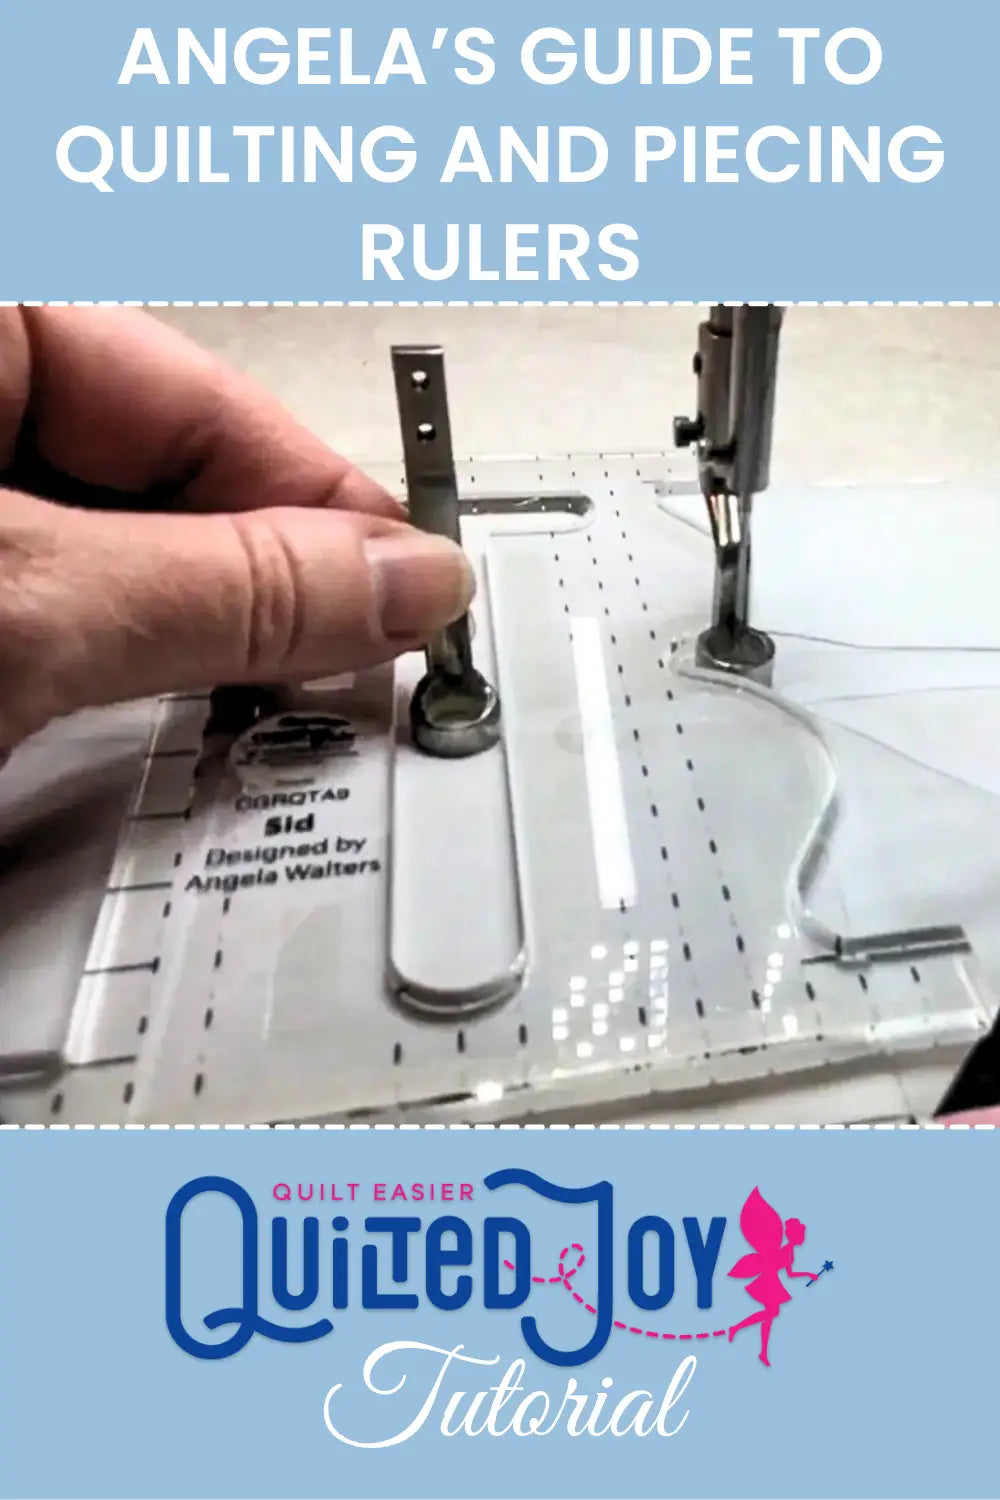
Angela’s Guide to Quilting and Piecing Rulers
During our recent Quilted Joy Clubhouse livestream, I shared some of my favorite rulers that make quilting easier, more accurate, and a lot more fun. From soft curves to precision piecing, these tools help you achieve professional-looking results on both longarm and sit-down machines. This post highlights each ruler featured in the video, plus a few tips on how to use them for specific quilting techniques.
Curves and Arcs for Machine Quilting
One of the rulers I reach for constantly is the BFF Ruler by Linda Hrcka of The Quilted Pineapple. With a mirrored arc on both sides, it fits comfortably in the hand and makes soft curved quilting simple. I use it often when working on blocks that need gentle arcs or border details.

For larger sweeping curves, Linda’s Big Curve Set is ideal. These rulers are perfect for swags, borders, and curved crosshatching, especially on big quilts.
Another great option for adding movement is Lisa Calle’s Quilter’s Groove Circle Rulers. These make it easy to stitch perfect circles and are great for fills, wreaths, or block centers that need a little personality. We have have these for purchase individually and in sets.

If you're ready for more advanced ruler work, Bethanne Nemesh’s Lily Lines II offers beautiful French curve shapes for custom quilting. To plan out your stitches with precision, I recommend using a drawing wheel to mark designs on paper first. This ruler is ideal for quilters who want to create fluid, artistic quilting paths. Check out the Lilly Lines 1&2 ruler set!
Tools for Stitch-in-the-Ditch and Straight Lines
 Angela Walters’ SID Ruler by Creative Grids is one of the best tools for beginners learning ruler work. The interior channel holds your ruler foot in place, helping you stay along the seam. Its notched sides, or “molars,” make it easy to position the foot and guide your stitches right into the ditch.

For longer seams and borders, the Garden Lines Ruler by Bethanne Nemesh of White Arbor Quilting gives you more length with the same helpful notches. Both are excellent for maintaining control and alignment on straight quilting paths.
Watch Angela’s demos in the full video at the top of the page to see how she uses each machine quilting ruler to create smooth curves, clean lines, and custom quilting designs.
Tips on Settings and Setup
For ruler work, always use a ruler base on your stand-up machine. It gives the ruler a stable surface and prevents hopping. I also recommend turning off Quilt Glide (or coast/cruise mode) during ruler work so you have full control over needle position. When switching thread colors, pin-baste generously and leapfrog between sections to avoid fabric shifting.

Piecing Rulers We Love in the Shop
At the cutting table, we looked at rulers the Quilt Fairies love for rotary cutting and precision piecing. The Quilter’s Select Non-Slip Ruler is one of our top recommendations. It grips the fabric without extra stickers or adhesive and doesn’t shift while cutting. My favorite size is 8.5" x 12", ideal for slicing strips or subunits.
Creative Grids Square Rulers are another favorite. They feature textured grip circles on the back and easy-to-read black and white markings. The strong diagonal line makes block trimming fast and accurate.

If you’re cutting lots of strips, the Stripology XL Ruler will save you time. Its pre-cut channels and bold visual markers let you cut multiple strips in one pass without sliding the ruler.
Trimming Tools for Piecing Accuracy
The Tucker Trimmer by Studio 180 Design is my go-to for trimming half-square triangles and hourglass blocks. It includes guides for both whole and half-inch units, helping you cut cleanly and consistently.

The Ultimate Flying Geese Tool from Creative Grids is another smart addition to your toolbox. It includes reference charts and video instructions to make trimming geese fast and frustration-free.
For square-in-a-square blocks, Studio 180’s Square Squared ruler ensures you trim with precision. It includes markings to guide trimming without losing your points.
The V Block Trimmer, also from Studio 180, helps you clean up diamond or arrow-shaped units. It makes alignment simple and gives you clean results every time.
The Split Rects Ruler is designed for those tricky split rectangle units. It compensates for the offset seam placement, making trimming far more reliable than trying to eyeball it with a regular ruler.
Be sure to watch Angela’s demos in the full video at the top of the page for a closer look at how each piecing ruler works and the techniques she uses to get beautiful results.

Free Gift with Purchase
If you’re ready to stock up on rulers, for a limited Time we’re offering a special bonus. Now through Sunday August 10th, any ruler or template purchase of $39 or more includes a free Mystery Fat Quarter Trio. Just add your rulers and the trio to your cart and check out. The discount applies automatically, and the Quilt Fairies will pick a lovely surprise bundle for your stash.
![]()
Exploring the right rulers can make all the difference in your quilting journey. From smooth arcs to sharp points, the tools we covered here are designed to help you quilt with more confidence and creativity. You can catch the full demonstration in the video at the top of this page for a closer look at how each ruler works and fits into real quilting projects.
Have a favorite ruler of your own or one you're excited to try? Let me know in the comments! I’d love to hear what you’re working on. Until next time, happy stitching!

I’m Angela- Co-host of the Fons & Porter’s Love of Quilting PBS show. APQS Long arm Dealer and Educator. Triplet Momma. Designer. Thread Bimbo.


Leave a Reply