


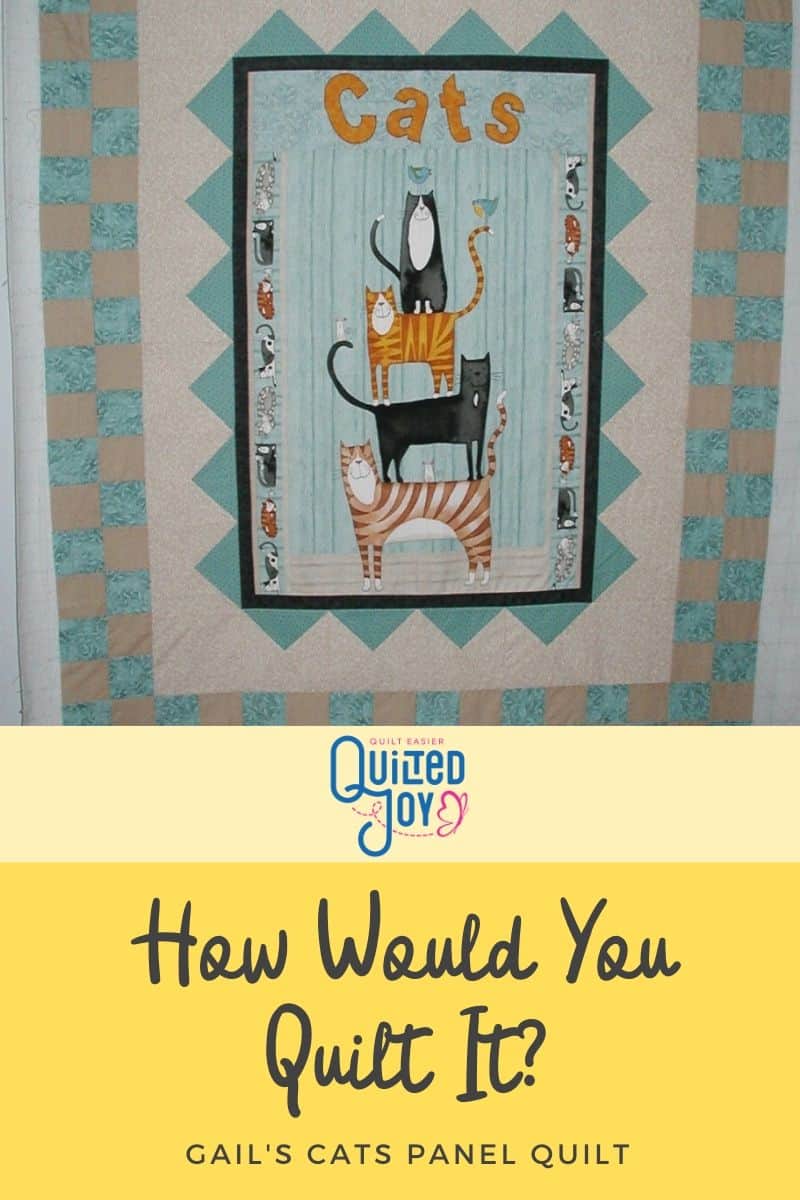
How Would You Quilt It? Gail's Cats Panel Quilt
Every month during our Quilted Joy Clubhouse live meetings, we spend a few minutes looking at how I might quilt a quilt top. These quilt tops are not my own. Instead they came from unquilted tops shared in the Quilted Joy Clubhouse Facebook Group. (Click here to join in the fun over in the group!)
For the September 2019 livestreamed meeting, I was excited to design a quilting plan for a panel quilt shared by Gail. Watch the video below that begins at our How Would You Quilt it segment. You can also click here to watch the meeting from the beginning.
Panel Quilts
Let me start by saying, I love to quilt with panels! I’ve quilted a few myself and we’ve seen lots of panel quilts come into the studio from our longarm machine renters. Some people may call them “cheaters,” but I disagree! Panels are a great space to learn and develop your machine quilting skills without investing a lot of time in piecing a quilt top first. You can find a huge variety of panels online and at your local quilt shops.

Gail found this really sweet Cats panel and added pieced borders for a little more interest. The added border gives us even more space to play and challenge ourselves to develop our skills and try different techniques!
Tracing
To quilt a panel like Gail’s, the first thing I know I’ll want to do is trace or echo around several of the elements in the panel. I’ll trace around the bodies of all the cats, mice, and birds. Depending on their size, I might also want to quilt into the bodies of the cats a little bit more. Check your batting to determine what the recommended minimum quilting space is. Find more helpful articles about batting and how it affects your quilting here.

I also know that I’ll want to trace around the word “Cats” at the top of the panel. Again, I’ll just trace around the edge of each letter. Think of all this tracing as training for quilting around all kinds of shapes with your machine. It may not seem super important on a panel, but you’ll be grateful you had all this practice when you’re quilting around appliqué and don’t want to quilt over Sunbonnet Sue’s toes!
Background Fills
For the rest of the panel I wanted to keep it simple with some background fills. Again, use this space for practicing any fills or designs you’re working on. I added a simple meander behind the letters so that the words stand out a bit more.

Your background fills could also pull inspiration from the panel itself. The cats are standing in front of a wood panel or bead board wall. I wanted to play with that inspiration with lines behind the cats. If you’re wanting to practice with your ruler, go ahead and pull it out and quilt straight lines. But if you’re just going to free hand this, I recommend using wiggle lines instead of straight lines. Wiggle lines are inherently uneven and therefore super forgiving! A wobble or bobble in your straight lines can easily catch your attention for all the wrong reasons.
Below the cats, I pulled inspiration from the panel again and added a wood grain filler to match the floor.
Setting Triangles
Gail added a large border and setting triangles around the panel - and what a fun place to play with the quilting! There are all kinds of ways to quilt setting triangles like these - you’ll find a few ideas I have for triangles in another Clubhouse meeting here. For this quilt I wanted to keep them simple and added lowercase e’s and L’s. As an added bonus, they look a little like yarn the cats have been playing with!

Asymmetrical Checkerboard Borders
The real challenge of this quilt design was Gail’s checkerboard borders! On the sides of her quilt, the borders are two rows deep. But on the top and bottom, they’re three rows. On most quilts I’ll have the border design be the same all the way around the border. Because Gail’s borders are asymmetrical, I needed to be a little more creative!
I wanted to bring the cats into the outer border with little cat paws walking up the sides of the quilt. As a machine quilter I prefer continuous line designs. Translating a doodle into a continuous line will take a bit of practice on paper before moving to the machine. I broke the cat paws down into two familiar shapes - a kidney bean for the paw and loops for the toes. Thankfully, this is a playful and cartoonish quilt. So if my cat paws aren’t all the same that’s ok!

Along the top and bottom border, the simplest design would be a crosshatching design following the diagonals of the squares. This would be a fabulous place to get some practice with your straight edged ruler! Or use those wiggle lines for a more forgiving design. I brought those straight lines down the empty spaces in the side borders as well.
Large Negative Spaces
The border fabrics are a little plain compared to the cats in the panel. Just like that outer border, I wanted to bring more kitty cat playfulness into the big open space of the inner border. In the corners I added big rounded curves that look like cat tails. And the cats need something to play with, so how about some yarn trees between the setting triangles? Conveniently, this design plan comes together for an easy continuous design with the setting triangles!
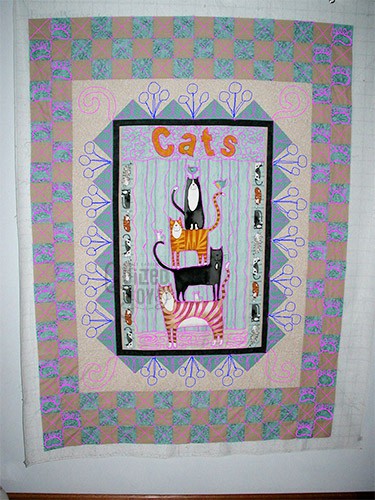
Gail’s Finished Quilt!
Isn’t that such a fun quilt? Panels are a great place to learn, play, and get to know your machine. Gail recently shared her completed quilt in the Quilted Joy Clubhouse for everyone to see!

She said this was the first quilt she quilted on her new longarm machine, and she didn’t feel quite ready to tackle lots of free motion designs. As you can see she quilted a free motion loopy meander in the center of the quilt and used my suggestion of straight line crosshatching in the outer border. It really is a great place to practice using a ruler! Great job Gail, and thank you for sharing your finished quilt in the Clubhouse!
I hope seeing how I design a quilt plan is helpful to you when you’re planning your own quilts. And if you enjoy this video, I hope you’ll join us in the Quilted Joy Clubhouse! We livestream a Clubhouse meeting on the first Wednesday of every month at 1pm Eastern in the Quilted Joy Clubhouse on Facebook and on the Quilted Joy Youtube. I hope you can join us for future meetings!
I’m Angela- Co-host of the Fons & Porter’s Love of Quilting PBS show. APQS Long arm Dealer and Educator. Triplet Momma. Designer. Thread Bimbo.

Leave a Reply