


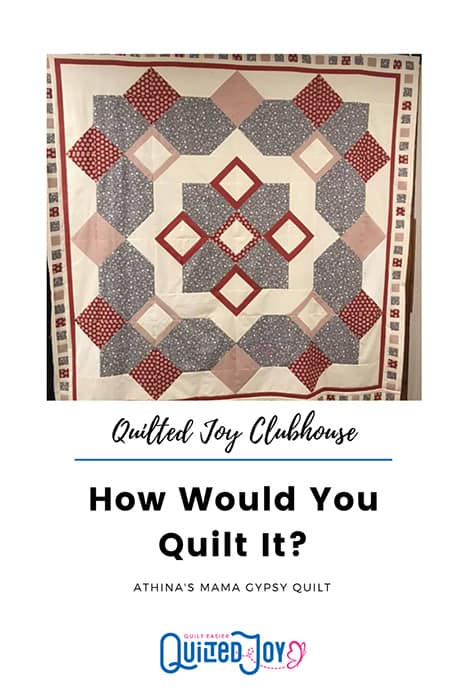
How Would You Quilt It?: Athina's Mama Gypsy Quilt
Every month during our Quilted Joy Clubhouse live meetings, we spend a few minutes looking at how I might quilt a quilt top. These quilt tops are not my own. Instead they came from unquilted tops shared in the Quilted Joy Clubhouse Facebook Group. (Click here to join in the fun over in the group!)

Back in October of 2019, I chose Athina’s Mama Gypsy quilt. Judi Madsen is a incredible quilter who designed this lovely quilt she titled Mama Gypsy. Athina picked her own colors and created this lovely example of the pattern in reds, grays, and whites. Watch the video below that begins at our How Would You Quilt it segment. You can also click here to watch the meeting from the beginning.
A Quilting Plan for Athina's Mama Gypsy Quilt
The corner shapes spoke to me first. We marked halfway along the sides and bottom and connected them to create a kite shape. This shape repeats in the interior of the design as well, which helps keep the overall feel cohesive. And while I don’t worry about the path of the design right away, I noticed that if I connected the points of this interior star shape, it would give me a way to travel between all of these kite shapes.

The next shapes to draw my eye were the on point squares in the center. These just needed to be stitched in the ditch, but the centers could be a great place for a feather spray. I repeated these feathers in the light colored diamonds that sit on the compass points of the design. The remaining squares, which had that great polka dot fabric, received a simple cathedral window or pumpkin seeds. This gives me the three motifs that repeat throughout the quilt, feathered sprays, long curved lines, and doubled diamonds.

I’m also beginning to figure out how all these designs begin to fit together into one continuous path. You just have to look for your Magic Portals. This is anywhere your designs collide with each other and allow you to jump between the different motifs. You also don’t want to be afraid of stitching right back on top of yourself on occasion when you need to.
Next I would fill those large gray areas around the edge of the body with more diamonds, add more feathered sprays into the corners, and add long curved lines with curved crosshatching in the negative spaces around the quilt. Click here for more information on how to add crosshatching to your quilts check out this post. The border is lovely all on its own, so simple piano keys quilts it without distracting from all your work in the middle.

Athina's Finished Quilt!
You can see that Athina decided to follow my recommendations, but she also knew how big her quilt was and what was needed for its size. She quadrupled the diamond and added additional lines to the center frame. It looks amazing!

Athina did her own take on a feathered spray in the corners which is lovely. It allowed that curved crosshatching to really shine and the large space in the corner to blend a little better with the rest of the border than a large spray may have done. I think it was a great call. And to think this was Athina’s first time working with cross hatching! Wow! What an accomplishment. You did an amazing job, Athina!

Athina's Mama Gypsy quilt was such a success, I can't wait to see more. I hope that now that she's tried the cross hatching she’ll be more likely to try it again. It’s my hope that as you all see the process, you’ll feel more confident as you design your own quilting plans. It’s not that hard, it just takes practice and time. When you’re done, connect with us on Facebook or Instagram. We’d love to see what you’re working on!
I’m Angela- Co-host of the Fons & Porter’s Love of Quilting PBS show. APQS Long arm Dealer and Educator. Triplet Momma. Designer. Thread Bimbo.

Leave a Reply