Video: How Would You Quilt It? Tina's Lamb Quilt
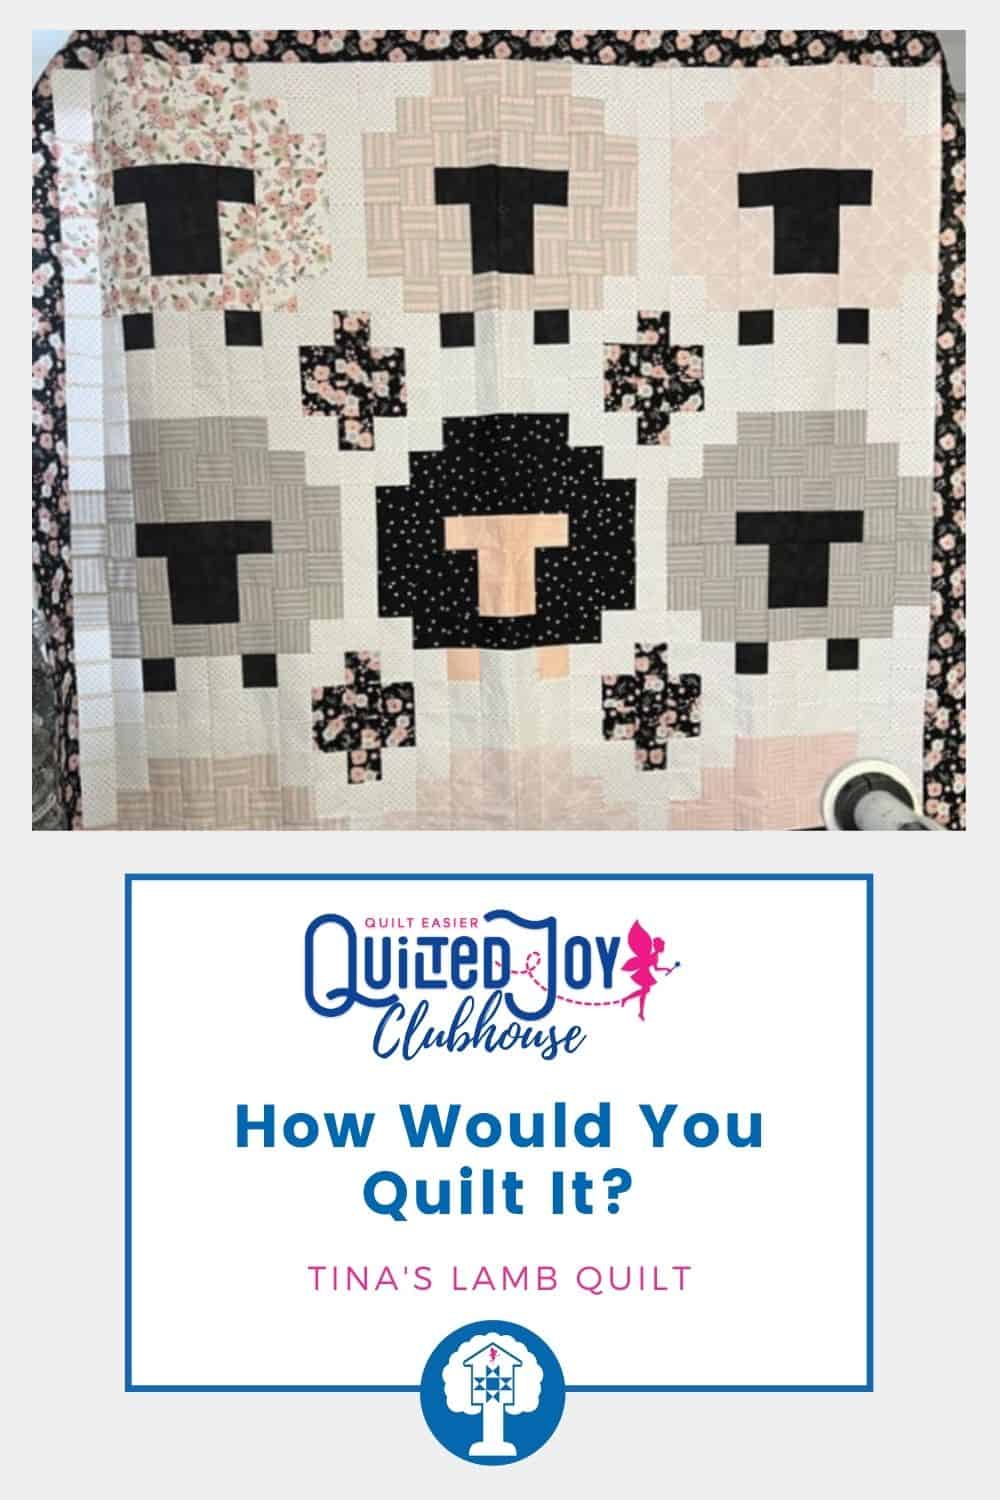
The quilt that I chose for March’s Clubhouse meeting made me laugh out loud and squeal! I knew that it was the one I was going to have to go with. I absolutely love Love LOVE IT! Isn’t it cute with all those little lambs?! Let’s take a look at Tina's quilt, and how I would quilt it if it were my quilt.
Stitch in the ditch
The first thing that drew me to Tina’s quilt was the texture I could add to the little Lambs with some free motion quilting. To get started, you’re going to want to stitch in the ditch around each lamb.

When we do free motion quilting, it’s going to be a little dense. Having your little sheep all nailed down, will keep things stable as you’re filling up the wool area on your Lambs.
3’s and E’s
Let’s add some texture by adding a curly-Q design to the bodies of the little lambs to make it look like wool. To do this I’m going to use a quilt pattern called “3’s and E’s”. The reason it’s called 3’s and E’s is that those are the two shapes that you’re going to use to make the curls in the wool. To start, I’m going to stitch the shape of a 3, and then I’m going to tuck the bottom of that three way in. Next I’m going to stitch the shape of an E, coming out and tucking the bottom in, and I’m just going to keep changing direction each time.


The key to this is to really tuck that tail way in, so that it gives you room to move around. Stitch 3’s, then tuck, stitch E’s, then tuck, and just keep repeating that. When you get back to where you started just reach up and touch it to combine it. If I get stuck somewhere, and I’m like, oh! I don’t have any room! Well, there’s a little magic super highway around the lamb where you stitched in the ditch, that you can zoom down and then duck back in and fill. It’s not a big deal if you get stuck in a corner, you can always get yourself out! If you’ve never done 3’s and E’s, get some paper out and play! You’ll find it’s a really fun and easy filler. Aren't the little lambs just so cute with their curly wool?
Snoots & Boots:
Let’s move on to those snoots and boots on the cutie pie Lammie Lamb! For the lamb faces, I started out by connecting the area right below the ears with straight lines in a chevron shape

Towards the bottom of the face, I would repeat the chevron lines and that would give the lamb a cute little nose. Repeat this for the little hooves, using smaller chevrons.
Framing the Lambs:
There’s this interesting space around where the rows of lambs come together, but they’re not totally equal. Because it’s asymmetrical it gives you some interesting options! What I decided to do is stitch diagonally on the intersection of the middle seam. It creates diamonds that have an interesting tiled effect that I thought was really kind of cool!


Then I thought, I’d really like to do that again to really frame it out. I would do this by creating a double frame to go around each of those little inset areas we just created. I would just repeat this around the outside area next to the flower border, all the way around the quilt. To travel across, stitch the top 1/2 of the first square, then travel straight across, over to the next one and stitch the top 1/2 of that square. Repeat for the next square, travel over and up and then come back the other way and that’s how we get these tiles. I think it looks pretty, like it’s almost beveled.
Inner flowers:
Each of the inner flowers are pieced in a floral fabric, and have asymmetrical grids that are built into them. My thoughts were to create an elongated medallion in the center of each grid using a series of bunny hops. I think this would be very pretty, and it would also give me the chance to repeat it in the border.

Because the floral fabric in the border is busy, the quilting is not going to show very much. It’s best to keep things simple here, so I don’t want to do anything fancy like feathers, as they would get totally lost. Extending the square lines out to the border creates visual continuity by linking everything together. The final thing I would do is bring in that same flower shaped elongated medallion we made, and repeat it around the border.
And that’s how I would quilt It! Of course Tina, you can quilt your amazing lamb quilt any way you’d like and we’d LOVE to see it regardless! When it’s done, be sure to add a post to our Facebook or Instagram so that we can all see what you choose to do!


I’m Angela- Co-host of the Fons & Porter’s Love of Quilting PBS show. APQS Long arm Dealer and Educator. Triplet Momma. Designer. Thread Bimbo.



Leave a Reply