


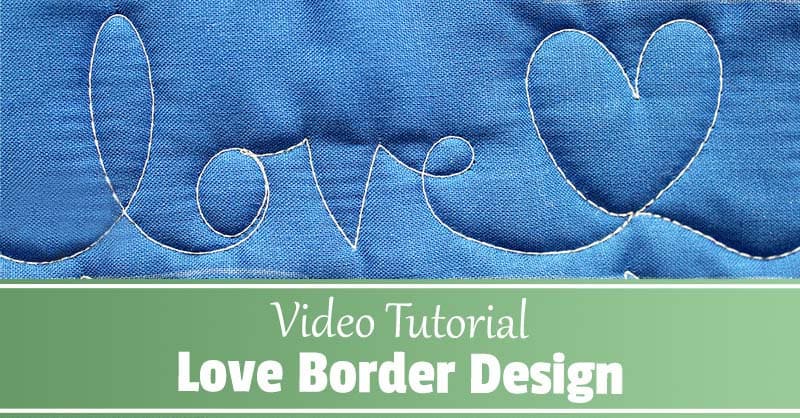
Video: How to Quilt the Love Border Design
It’s so much fun to add little personal touches to your quilts. In my latest video tutorial for APQS I shared how to use your own cursive handwriting to add a special message to your quilts!
The Love Border Design is perfect for the quilts you’re gifting to special loved ones! Watch the video below to see how I used my own handwriting to make a unique quilting design.
How to Quilt the Love Border Design
I promise you, you can’t mess this one up! All we’re doing for this sweet border design is “writing” the word love with our quilting machine. If you’ve been writing in cursive most of your life, you probably have a strong muscle memory for those shapes and movements. That’s going to make quilting this design super easy and probably relaxing. Don’t worry if some of your letters aren’t perfect – you’ll notice some of my v’s look a little more like u’s. Those little imperfections make it truly yours and uniquely you!
Add Extra Elements
Simply quilting out the word love over and over can become very repetitive. To break them up a little you can add other fun elements like hearts or flowers! Look to your fabrics and recreate motifs you find in the prints. Or, if you’ve made this quilt for someone add other words and phrases that are special to your recipient. It’ll be like your quilting acts as a second label for the quilt!
Now it’s Your Turn!
Now that you know how to quilt the Love border, it’s your turn to give it a try! I would love to see your version of this design. You can share pictures of your quilts with me at the Quilted Joy Facebook page, tag me on Instagram, or join the community in the Quilted Joy Clubhouse!
If you would like to explore more tips and tricks for longarm quilting don’t miss the Quilted Joy Learning Center!
I’m Angela- Co-host of the Fons & Porter’s Love of Quilting PBS show. APQS Long arm Dealer and Educator. Triplet Momma. Designer. Thread Bimbo.

Leave a Reply