Video Tutorial: How to Quilt a Curled Scallops Border
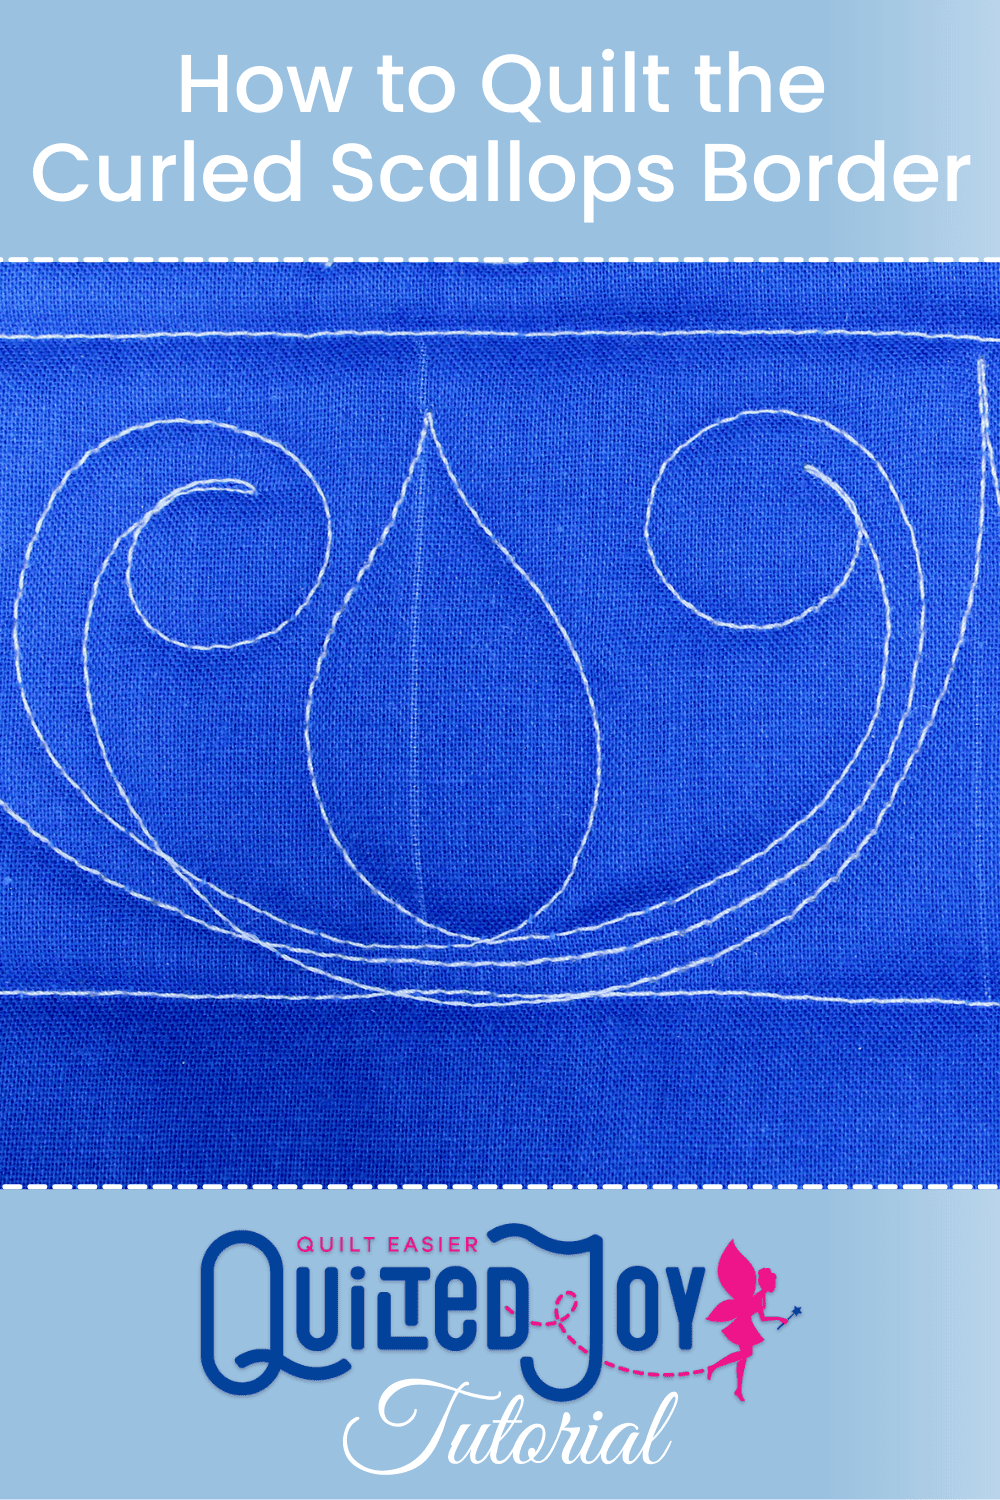
If you're looking for a fun border design, check out my latest video tutorial for APQS. In this video, I'll show you how to quilt a Curled Scallops Border design. Take a look at the video below!
Doesn't that design remind you of Lumiere from Beauty and the Beast? He's inviting us to be his guest. :)
To quilt this border design I started by marking my guidelines. Using a chalk pencil, I marked two inch segments and I'm using two segments at a time.
There are two main elements to create the Curled Scallops design: a curl and candle flame or teardrop shape. We're going start at the top of one of the markings. Swoop down through the middle line and quilt a curl along the next line. Bring your curl back down the swoop towards the middle line.
At the middle line you'll add the candle flame curve. Try to use the chalked line as a meridian guide. But don't worry if you're not perfect - you'll wipe those marks away later and it'll be hard to see where the center was supposed to be.
After your candle flame, swoop back towards where you started and quilt another curl. Make sure this curl's head is facing towards the other curl. Follow your swoops to the next set of marked lines.
The Curled Scallops Border is one of those designs I'd practice on paper a few times before taking it to the machine. Start building your muscle memory with pen and paper and it'll be a little easier on the machine. And if you're struggling with the candle flame in the center try mixing it up with something else. A little circle or a lowercase "L" would look just as nice between the curls.
Are you ready to try quilting curled scallops? I want to see what you create! Share pictures with me over on the Quilted Joy Facebook page or tag me on Instagram!

I’m Angela- Co-host of the Fons & Porter’s Love of Quilting PBS show. APQS Long arm Dealer and Educator. Triplet Momma. Designer. Thread Bimbo.




Leave a Reply