Video: How to Quilt the Seedling Border

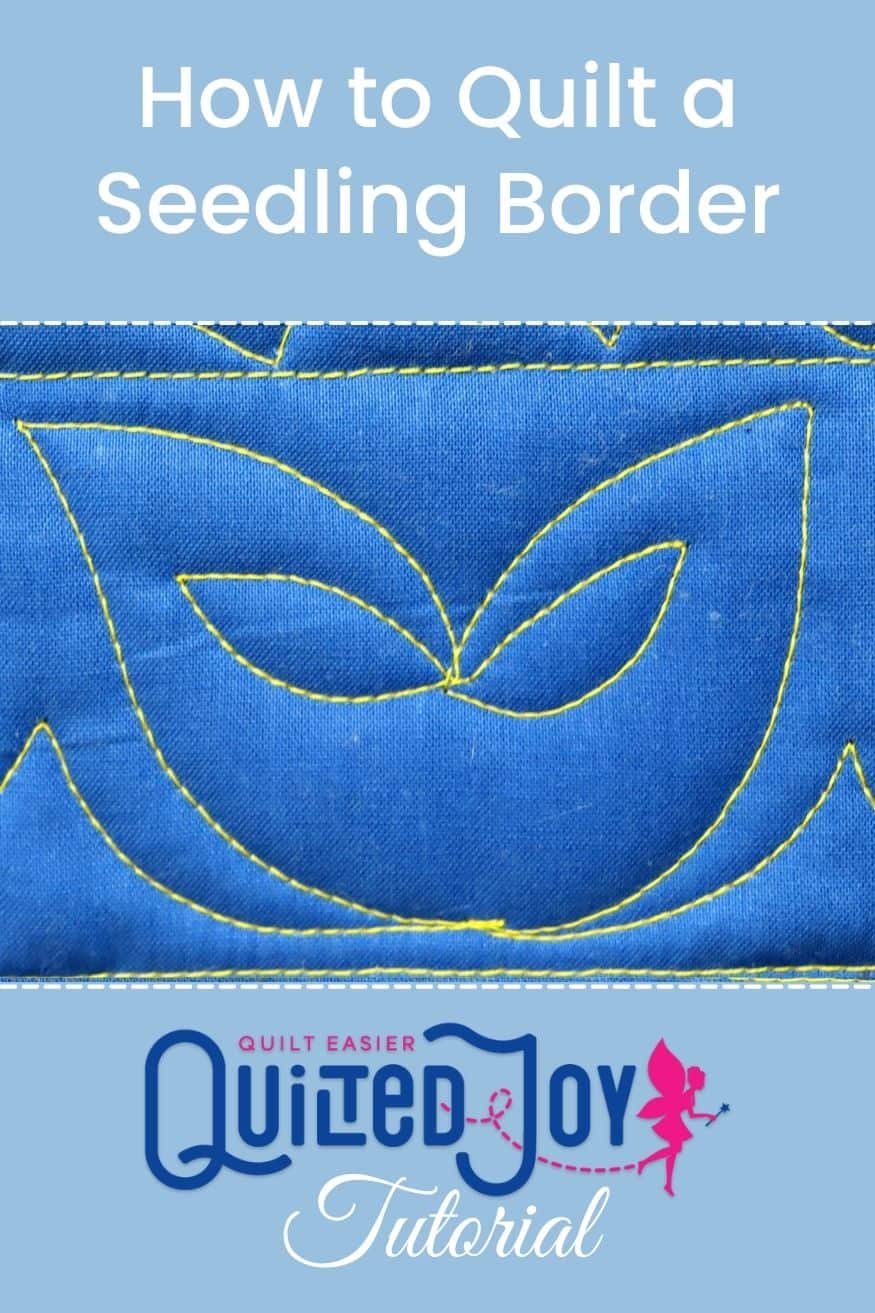
In this APQS video tutorial, you’ll learn how to quilt the Seedling border design. This leafy border is a breath of fresh air. Watch the video below to see how to quilt it!
How to Quilt the Seedling Border
Let's play with leaves! To start your seedling border, swoop down to your border’s base. Swoop back up to make the first leaf. Once you get to the cleft of the leaf, or near the middle of your border, you want to echo the shape of your larger leaf inside the line you already created. This shape will make a little leaf. Mirror that motion on the other side to have a pair of little leaves. Head back up, then down to create your outside leaf. To connect your leaves, create a small peak at the base of your border. Onto the next one! Continue quilting this same design along the length of your border.
The Seedling Border is versatile!
The Seedling border is made with swooping leaf designs, which makes it a perfect match for floral or leafy fabrics. Try the Seedling out on a gardening quilt or an autumnal quilt. I think the pair of little leaves resemble maple seed pods as they helicopter down to the ground!
With a design like this, the Seedling can be whatever you choose it to be! Maybe you think it looks like leaves, and maybe you don't - that's okay! Another quilt where the Seedling would fit nicely is a themed Mardi Gras or New Orleans quilt. The design looks a little like a Mardi Gras mask - don't you think?
Now It’s Your Turn!
Now that you know how to quilt the seedling border, it’s your turn to give it a try! I would love to see your version of this design. You can share pictures of your quilts with me at the Quilted Joy Facebook page, tag me on Instagram, or join the community in the Quilted Joy Clubhouse!
If you would like to explore more tips and tricks for longarm quilting, don’t miss the Quilted Joy Learning Center!


I’m Angela- Co-host of the Fons & Porter’s Love of Quilting PBS show. APQS Long arm Dealer and Educator. Triplet Momma. Designer. Thread Bimbo.


Leave a Reply