


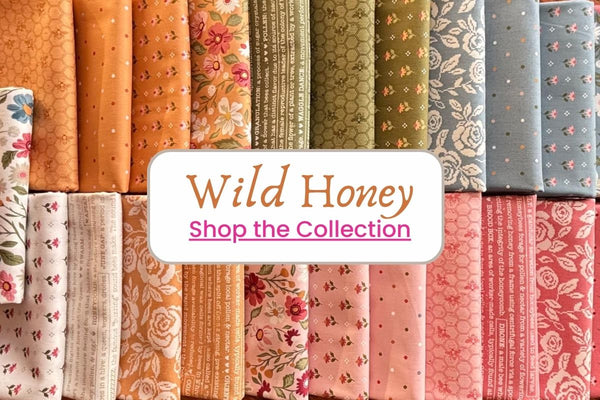


Make a Chenille Pillow with Susybee Panels!
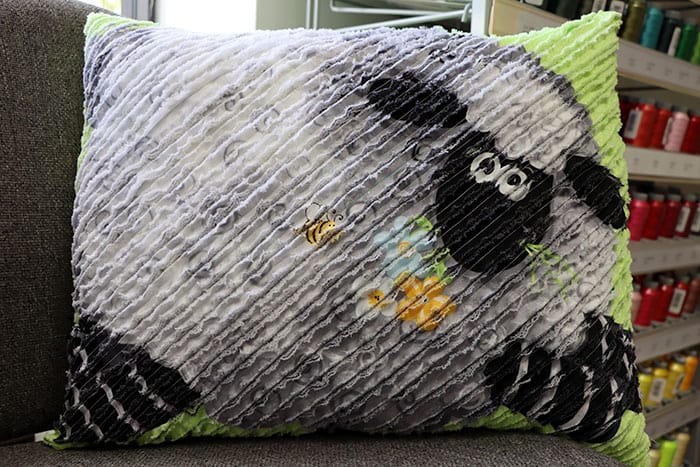
If you’ve followed me for a while now, you’ve probably heard of my love for fabric panels. So many people still call them cheater panels, but I wholeheartedly disagree! Fabric panels are the perfect place to play, try new techniques, and practice your machine quilting skills. I especially love the fabric panels from Susybee Textiles for both practicing free motion quilting and chenille. Take a look at how we turned adorable Susybee panels into a chenille pillow!
How to Make a Chenille Pillow with Susybee Panels

Have you tried chenille yet? It creates a fun, fuzzy texture on your projects. There are so many ways you can use chenille, and I thought you’d love to see how to make a sweet Lewe the Ewe chenille pillow! We tried it out and this is such a fun project you can finish in an afternoon!
Supplies
Here are the supplies you’ll need to make your Lewe the Ewe chenille panel:
- 1 Lewe the Ewe panel - You’ll need 4 identical repeats of this lamb, and the panel we have comes with all 4 in one!
- Thread that compliments your fabric - we used Premo-Soft White
- 24” ruler to mark your bias lines
- Blue painter’s tape
- Olfa Chenille Cutter
- Chenille Fluffing Brush
- 1/2 yard backing fabric
- Pillow form or poly fill
Steps
Cut your Lewe the Ewe Susybee panel along the white lines separating the repeats and remove any selvedge edges. Trim 3 panels all around to be about 3/8” smaller than your 4th panel. We promise this will be very helpful later!

Layer your panels face up, starting with the panel you didn’t trim. Try to align them so that your lamb is in the same position. To make this a little easier, we used a pin to “pin align” our panels. Choose any target spot on your panel, and push a pin through that spot on each layer of your panel. It can also be helpful to place a piece of scrap batting under your panels so you have something thick and squishy for your pin to stick through. Spray baste or pin baste your layers together.
With the ruler and blue painters tape, mark a diagonal line across the center of your stacked Susybee panels. We decided to go ahead and mark the diagonal lines radiating out from that point at 3/8” apart with a blue washable fabric marker. If you don’t want to mark all those lines, you can instead use your walking foot as a guide. You can also space out your lines more or less depending on how much chenille fluff you’d like on your pillow! We just recommend keeping those lines consistent!

Now it’s time to stitch your rows! Start from your center line and work out to the edges of your panels. Stitch each diagonal line, going back and forth, back and forth across the panels.
Next you’ll cut the top 3 panels between your stitch lines with your Olfa Chenille Cutter. We like to use sharp scissors to make small relief cuts at the start. This will give your Olfa Chenille Cutter a little more room to grab the fabric. Just be careful to only cut through your top 3 layers, leaving your bottom panel uncut. Since we left the bottom panel a little bigger than the rest, it’ll be easier to see and avoid that panel!

Finally, you get to chenille, or bloom, your Susybee panel! Grab a spray bottle of water and spritz your lambs with water. With the Chenille Fluffing Brush, brush your panels in a circular motion. The cut ends will start to shrivel and bloom, adding that fun fluffy texture!

Now you’re ready to turn this into a pillow! Be sure to download the full free pattern here where they describe the final steps to turning this into a pillow. For the back of our pillow, we used a complimentary solid green fabric we found in our fabric stash. But you could also amp up the snuggle factor with this lime green Shannon Cuddle fabric!
You can use this chenille technique and Susybee panels for so many projects! One of our Quilt Fairies here in the shop made a chenille play mat using the Susybee Zoe the Giraffe panels and a cuddly micro fleece backing that her grandkids absolutely adore! I also shared a few ideas in Fons & Porter’s Love of Quilting episode 3612 Rockets & Widgets. During the episode I showed how I used chenille on my Susybee Zig the Flying Ace Dog panel quilt and added chenille appliqué to a quilt.
A world of Possibilities!
Are you super excited to make your own Lewe the Ewe Chenille pillow? Give it a try and be sure to post your pictures over in the Quilted Joy Clubhouse on Facebook! And, if you're looking for even more panel inspiration, keep an eye on the blog. We'll be sharing another fun and easy project Susybee panels project soon!
I’m Angela- Co-host of the Fons & Porter’s Love of Quilting PBS show. APQS Long arm Dealer and Educator. Triplet Momma. Designer. Thread Bimbo.

Leave a Reply